introduction
Multiple columns is a common layout feature used in typesetting and design, allowing text and other content to be divided into multiple columns on a page. This layout style can be useful for presenting information in a compact and organized manner, making it easier to read and follow. This section explains how to provide multiple columns in your document.
Multiple columns in LaTeX
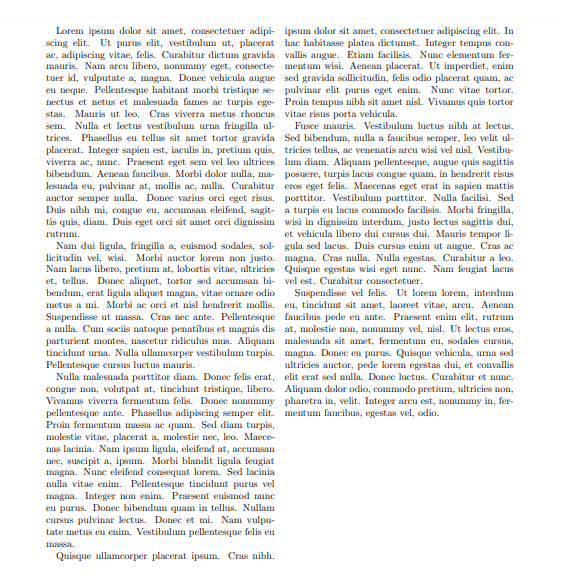
Creating a two-column document in LaTeX is simple, just add the twocolumn parameter to the document class declaration.
Here is an example of how to create a two-column document using the twocolumn parameter:
\documentclass[twocolumn]{article}
\usepackage{lipsum}

\begin{document}
\lipsum[1-6]
\end{document}
This example generates the following output:

For more advanced control over the column layout when creating a document with multiple columns, the multicol package provides a variety of commands that offer greater flexibility.
With the multicol package, you can easily create multiple columns of text, images, tables, and other content in your document. You can also adjust the number of columns, the width of columns, and the space between.
To use the multicol package, you need to include it in the preamble of your document using the \usepackage{multicol} command.
Once you have included the package, you can use the multicols environment to create your columns. The multicols environment takes an argument that specifies the number of columns you want to create, like this:
\begin{multicols}{2}
...
\end{multicols}
In this example, the multicols environment creates two columns. You can add your text, images, tables, and other content to the columns inside the multicols environment, like this:
\documentclass{article}
\usepackage{multicol}
\usepackage{lipsum}

\begin{document}

\begin{multicols}{2}

\section*{Column 1}
\lipsum[1-2]

\section*{Column 2}
\lipsum[3-4]

\end{multicols}

\end{document}
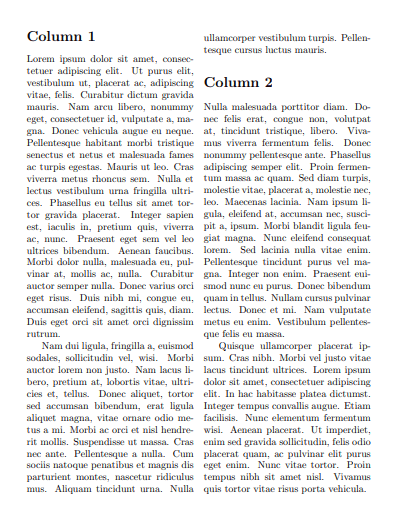
In this example, the first column contains a section title and some dummy text generated by the \lipsum package. The second column contains a different section title and dummy text. When you compile this code, you will see two columns on the page, with the text and section titles divided between them:
This example generates the following output:

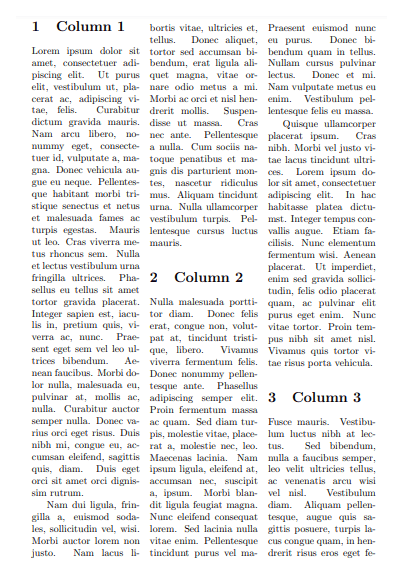
Here is an example of three column document:
\documentclass{article}
\usepackage{multicol}
\usepackage{lipsum}

\begin{document}

\begin{multicols}{3}

\section{Column 1}
\lipsum[1-2]

\section{Column 2}
\lipsum[3-4]

\section{Column 3}
\lipsum[5-6]

\end{multicols}

\end{document}
This example generates the following output:

Note that the multicol package provides many options and commands for adjusting the columns, such as the width of columns, the space between columns, and the balancing of columns on the page.
Here are some of the most important multicol package commands:
| Command | Description |
|---|---|
\columnsep | Sets the width of the space between columns |
\columnseprule | Sets the width and style of a rule between columns |
\columnwidth | Sets the width of each column |
\balance | Balances the last page of a multi-column document so that the columns are of equal height. |
\onecolumn | Switches the document back to single-column mode |
\columnbreak | Forces a column break |
\raggedcolumns | Sets the columns to have ragged-right (unjustified) text instead of justified text |
Note that there are many other commands and options available in the multicol package. These are just a few of the most commonly used commands and options to get you started.