LaTeX Quickstart
Welcome to our LaTeX quickstart guide, designed for users new to the LaTeX typesetting system using TexReady platform.
This section will provide a brief overview of the basics of LaTeX and guide you through the process of creating your first document. Whether you're working on a simple report or a complex thesis, this guide will give you the foundational knowledge needed to get started with LaTeX. No prior experience with LaTeX is needed.
Basic LaTeX document structure
Let us see LaTeX in action by creating a simple document.
Every LaTeX document requires the following three components. Everything else is optional, even text.
\documentclass{article}
\begin{document}
\end{document}
The document class
The first statement specifies the type of document that LaTeX should process, as there are different style rules for different types of documents, such as:
- article → to write an article
- beamer → to create a presentation
- book → to write a book (like your thesis)
- letter → to write a letter
\documentclass command must be the first command in the document, before any other LaTeX commands, otherwise the compiler may not be able to determine the correct formatting rules, so an error message will be generated. The default font size for all classes is 10 points(pt), but you can specify a different size like 11 or 12 points by including it in the \documentclass command, like this:
\documentclass[11pt]{article}
or
\documentclass[12pt]{article}
\documentclass[10pt]{article} is not necessary.On the document class declaration line you can also specify the paper layout, such as:
- twocolumn → Produces two-column output.
- a4paper → This ensures that the page is appropriately positioned on A4 size paper.
\documentclass[a4paper,12pt]{article}
{}, while optional information is placed within square brackets [].The preamble section
The preamble in a LaTeX document is the space between the \documentclass and \begin{document} commands where you define the document class, include packages, specify properties, set page layout, and define custom commands. For example:
\documentclass{article}
\usepackage[margin=1in]{geometry}
\usepackage{hyperref}
\newcommand{\mycommand}[1]{\textcolor{red}{#1}}
This sets the document class to article, sets the page margins to 1 inch, loads the hyperref package for hyperlinking and defines a custom command "mycommand" to make text red. This preamble provides a basic setup for a document and is a good starting point for a simple document.
In this section of the text file you will tell LaTeX about all the tools that you need to use:
- Packages
- Commands
- Files
The main body of the document
The body of the document should be placed between the \begin{document} and \end{document} commands, anything after the \end{document} command will be ignored.
\documentclass[a4paper,12pt]{book}
\begin{document}
This is my first document in LaTeX.
\end{document}
This example generates the following output:
Title, authoring and abstract
It is good practice to include the title, author, and date in the preamble of your document, which can be used by various LaTeX commands.
\documentclass{article}

\title{Latex Quickstart Document}
\author{Author's Name}
\date{\today}

\begin{abstract}
This is the abstract of my document.
\end{abstract}

\begin{document}
\maketitle
\end{document}
This example generates the following output:

Tips:
-
If the
\datecommand is not included, the current date will be printed by default. -
The command
\todayautomatically selects the current date. -
To specify a different date,
\todayshould be replaced with the desired date in curly brackets, e.g.\date{July 01, 2022}.
Organizing your content
It is important to organize your work in a clear and logical manner in order to make it easy for readers to understand. This can be achieved by dividing it into sections, chapters, and other appropriate segments.
To create a new section, use the \section command followed by the title of the section within curly braces {}.
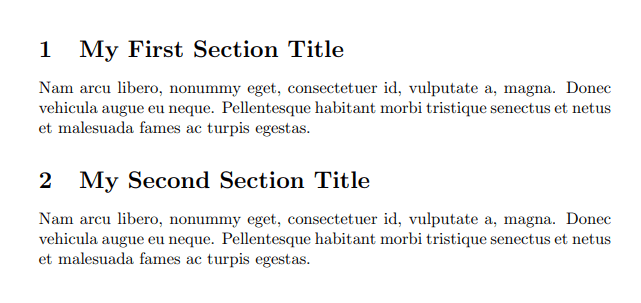
\documentclass{article}
\usepackage{lipsum}

\begin{document}

\section{My First Section Title}
\lipsum[1][4-6]

\section{My Second Section Title}
\lipsum[1][4-6]

\end{document}
This example generates the following output:
LaTeX provides the following commands to help structure your document:
| LaTeX Command | Command Parameters |
|---|---|
| \part | \part[part short title]{part title} |
| \chapter | \chapter[chapter short title]{chapter title} |
| \section | \section[section short title]{section title} |
| \subsection | \subsection[subsection short title]{subsection title} |
| \subsubsection | \subsubsection[subsubsection short title]{subsubsection title} |
| \paragraph | \paragraph[paragraph short title]{paragraph title} |
| \subparagraph | \subparagraph[subparagraph short title]{subparagraph title} |
The first option of commands, which is placed within square brackets [], is optional and can be utilized to change the name of the section that will be displayed in the Table of Contents, if necessary.
LaTeX will automatically number the chapters, parts, sections, etc. If you do not want the section to be numbered use an asterisk (*) symbol:
\section*{My First Section Title}
\subsection*{My First Subsection Title}
Text formatting
LaTeX provides several commands for formatting text, including font styles and sizes.
Font size
By default, LaTeX uses the following standard font size for different components of a document:
| Document Component | Font Size |
|---|---|
| ordinary text | 12 |
| chapter numbering and title | 16 |
| section | 14 |
| subsection | 13 |
| subsubsection | 12 |
If you need different font sizes for regular text, the following commands can be used:
| Font Size | Command | Output |
|---|---|---|
| tiny size | \tiny{LaTeX Document} | |
| script size | \scriptsize{LaTeX Document} | |
| footnote size | \footnotesize{LaTeX Document} | |
| small size | \small{LaTeX Document} | |
| normal size | \normalsize{LaTeX Document} | |
| large size | \large{LaTeX Document} | |
| larger size | \Large{LaTeX Document} | |
| largest size | \LARGE{LaTeX Document} | |
| huge size | \huge{LaTeX Document} |
Font style
Font styles and effects are usually not applied in technical documents. Anyway, to change the font style, if needed, you can use the following commands:
| Font Style | Command | Output |
|---|---|---|
| italic | \textit{texready} | |
| bold | \textbf{texready} | |
| underline | \underline{texready} | |
| small caps | \textsc{texready} | |
| slanted | \textsl{texready} | |
| emphasize | \emph{texready} | |
| typewriter | \texttt{texready} | |
| san serif | \textsf{texready} | |
| roman | \textrm{texready} |
if necessary, the font style commands can be embeded into each others, as shown below:
\textit{\textbf{ItalicBoldTexReady}}
\textsc{\underline{SmallcapitalsUnderlineTexReady}}
This example generates the following output:
Font color
By default, LaTeX uses black color for texts. To change the color of specific text, an additional package, \usepackage{color}, must be added in the preamble.
The font color can be changed using the color command:
\color{color}{text}
The following table shows different color commands:
| Font Color | Command | Output |
|---|---|---|
| blue | {\color{blue}BlueTexReady} | |
| green | {\color{green}GreenTexReady} | |
| yellow | {\color{yellow}YellowTexReady} | |
| red | {\color{red}RedTexReady} |
There are many standard color names available to be used in LaTeX color command, if the color you want is not available you can define it using:
\definecolor{my_violet}{rgb}{127,0,255}
Notes
-
In the above example, the last argument represent the color's RGB values (red, green, blue) ranging from 0 to 255.
-
The
\definecolorcommand must be placed before the\colorcommand. A best practice is to define all the colors you plan to use in the preamble section of your document.
Special characters
LaTeX recognizes certain characters as commands. To avoid errors during the compilation process, it's recommended to become familiar with these characters:
\→ is the beginning of a command.#→ is used when creating commands.%→ is used for indicating a comment, everything follows on the same line is not interpreted, read or compiled by LaTeX.∼→ is used to insert a non-breaking space.{and}→ is used to group and separate commands from its surroundings (Must appear in pairs).$→ is used to start and finish a math mode.&→ is used to separate column entries in a table.^→ is used for superscripts in math mode._→ is used for subscripts in math mode.
Creating lists
In LaTeX, you can create various types of lists by utilizing environments.
An environment is a block of code that is used to implement a specific typesetting feature and typically starts with the command \begin{environment-name} and ends with the command \end{environment-name}.
Unordered lists
Use the itemize environment and \item command to create an unordered list, where each item is represented by a bullet point. The syntax is as follows:
\documentclass{article}
\begin{document}

\begin{itemize}
  \item First item
  \item Second item
  \item Third item
\end{itemize}

\end{document}
This example generates the following output:
You can also create a nested unordered list by placing one list inside another. It's important to note that the nested lists must be closed properly using the corresponding \end{itemize} command, like the following example:
\documentclass{article}
\begin{document}

\begin{itemize}
  \item First item
  \item Second item
    \begin{itemize}
      \item First sub-item
      \item Second sub-item
        \begin{itemize}
          \item First sub-sub-item
          \item Second sub-sub-item
        \end{itemize}
    \end{itemize}
  \item Third item
\end{itemize}

\end{document}
This example generates the following output:
You can also customize the appearance of the bullet points by passing options to the itemize environment.
Nested unordered lists are useful for organizing and structuring information in a hierarchical manner, making it easy to understand the relationships between different items.
Ordered lists
Use the enumerate environment and \item command to create an ordered list, where each item is automatically numbered. The syntax is as follows:
\documentclass{article}
\begin{document}

\begin{enumerate}
  \item First item
  \item Second item
  \item Third item
\end{enumerate}

\end{document}
This example generates the following output:
You can also create a nested ordered list by placing one list inside another. It's important to note that the nested lists must be closed properly using the corresponding \end{enumerate} command, like the following example:
\documentclass{article}
\begin{document}

\begin{enumerate}
  \item First item
  \item Second item
    \begin{enumerate}
      \item First sub-item
      \item Second sub-item
         \begin{enumerate}
          \item First sub-sub-item
          \item Second sub-sub-item
        \end{enumerate}
    \end{enumerate}
  \item Third item
\end{enumerate}

\end{document}
This example generates the following output:
You can also customize the appearance of the numbers by passing options to the enumerate environment.
Nested ordered lists are useful for providing a clear, easy-to-follow structure. They can be used to present a step-by-step guide, a process, or a list of instructions. They can also be used to present information that needs to be conveyed in a specific order. Additionally, nested ordered lists can help to emphasize the hierarchical relationship between different items.
Description lists
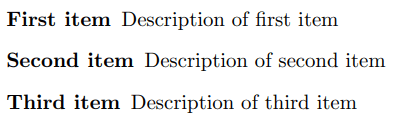
Use the description environment to create a list of items with their descriptions. The syntax is as follows:
\documentclass{article}
\begin{document}

\begin{description}
  \item[First item] Description of first item
  \item[Second item] Description of second item
  \item[Third item] Description of third item
\end{description}

\end{document}
This example generates the following output:
Inserting images and graphics
To insert an image in a LaTeX document, you must first make use of the figure environment. This allows you to add a caption for the image and also reference it in other parts of your document.
Additionally, you need to use the \includegraphics command provided by the graphicx package which should be included in the preamble section of your document using the command \usepackage{graphicx}. This package enables you to import and use various image formats.
For example, to insert an image called image.jpg in the same directory as your LaTeX file, you can use the following code:
\includegraphics[options]{file}
Where file is the path to the image file. The path can be either a relative or an absolute path.
For example, to insert an image called image.jpg in the same directory as your LaTeX file, and set its width to 3 inches, you can use the following command:
\includegraphics[width=3in]{image.jpg}
The \includegraphics command accepts several options that allow you to control the size, positioning, and appearance of the image. Some of the most commonly used options include:
widthandheight→ These options allow you to set the width and height of the image, respectively. The values can be specified in various units such as inches, cm, or pt.scale→ This option allows you to set a scaling factor for the image. For example, scale=0.5 will reduce the size of the image by 50%.angle→ This option allows you to rotate the image by a specified angle.keepaspectratio = true/false→ This option allows you to preserve the aspect ratio of the image when specifying the width or height.
You can include a caption and a label to the image using the figure environment:
\documentclass{article}
\usepackage{graphicx}

\begin{document}

\begin{figure}
\centering
\includegraphics[width=3in]{image.jpg}
\caption{This is an example image.}
\label{fig:example_image}
\end{figure}

\end{document}
This example generates the following output:
Tips:
- The
\centeringcommand is used to center the image within the figure environment. - The
\lablecommand is used to add a label for the image, which can be used to reference the image using the\refcommand. - The image file must be in a format that can be handled by LaTeX, such as JPEG, PNG, or PDF, some image formats might not be supported by all LaTeX compilers.
There are other packages available, such as subcaption and subfig that allow you to include multiple images in a single figure, with captions and labels for each image.
Creating and formatting diagrams and charts
Creating diagrams and charts in LaTeX can be done using several different packages, each with its own set of commands and options. Some popular options include:
-
tikzpackage → The tikz package allows you to create high-quality diagrams and graphics using a powerful and flexible drawing syntax. It can be used to create a wide range of diagrams, including flowcharts, mind maps, and state diagrams. -
pgfplotspackage → The pgfplots package is a powerful tool for creating various types of plots and charts, including scatter plots, bar charts, and line plots. It can also be used to create 3D plots and animations. -
pstrickspackage → The pstricks package is a set of macros that allows you to create diagrams and graphics using PostScript. It can be used to create a wide range of diagrams and graphics, including flowcharts, pie charts, and histograms. -
gnuplot→ gnuplot is a command-line program that can be used to create high-quality plots and charts. It can be used to create a wide range of plots and charts, including scatter plots, histograms, and 3D plots. -
chartpackage → The chart package is a simple and easy-to-use package that can be used to create basic charts and diagrams, such as bar charts, pie charts, and line charts.
\usepackage{package-name} and make sure the package is installed in your machine. Here's an example of how to create a simple bar chart using the pgfplots package:
\documentclass{article}
\usepackage{pgfplots}

\begin{document}

\pgfplotsset{width=10cm,height=7cm,compat=1.9}
\begin{tikzpicture}
\begin{axis}[ybar, xlabel=X axis, ylabel=Y axis, xtick=data, symbolic x coords={A,B,C,D}, ymin=0, ymax=20]
\addplot[bar shift=0.3cm, fill=gray] coordinates {(A,10) (B,15) (C,12) (D,8)};
\addplot[bar shift=-0.3cm, fill=yellow] coordinates {(A,15) (B,8) (C,7) (D,10)};
\legend{Data 1, Data 2}
\end{axis}
\end{tikzpicture}

\end{document}
This example generates the following output:
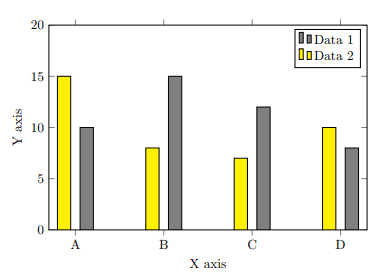
Notes:
- The
\pgfplotssetcommand is used to set the width and height of the chart, and the compatibility level. - The chart is created inside a
tikzpictureenvironment, and theaxisenvironment is used to define the chart's features. - The
ybaroption is used to create a bar chart with the y-axis as the vertical axis. - The
xlabelandylabeloptions are used to label the x and y axis respectively. - The
xtickoption is used to specify the x-axis tick marks.
The tick marks are the small lines that appear on the x-axis and y-axis of a chart, and they are used to indicate the scale of the axis.
xtick=datameans that tick marks will be placed at the data points.- You can also use the
xtick={value1,value2,...}to specify specific values for the x-axis tick marks. xtick=falseoption is used to disable tick marks on the x-axis.
In general, the xtick parameter is useful for fine-tuning the appearance of the x-axis and making the chart easier to read and understand.
- The
symbolic x coordsoption is used to specify the x-coordinates, in this case, {A,B,C,D}. - The
yminandymaxoptions are used to set the range of the y-axis. - The
\addplotis used to add data to the chart. Each set of data is defined by a set of coordinates, in the form of (x,y). - The
bar shiftoption is added to the\addplotcommand to shift the bars horizontally. Thefilloption is used to specify the color of the bars. - The
legendcommand is used to add a legend to the chart, and in this example, the legend shows Data 1 and Data 2.
Creating tables
There are several ways to create tables in LaTeX. One of the most common ways is to use the tabular environment.
The basic format of the tabular environment is as follows:
\documentclass{article}

\begin{document}

\begin{tabular}{|c|c|c|}
\hline
Column 1 & Column 2 & Column 3 \\
\hline
Row 1, Column 1 & Row 1, Column 2 & Row 1, Column 3 \\
\hline
Row 2, Column 1 & Row 2, Column 2 & Row 2, Column 3 \\
\hline
\end{tabular}

\end{document}
This creates a simple table with three columns and two rows.

Notes:
{|c|c|c|}→ the column format specification:- The letters
cspecify that the columns should be centered. - You can also use
lfor left alignment, andrfor right alignment. - The
|specifies that there should be a vertical line separating the columns.
- The letters
- Each row of the table is created using the
\hlinecommand, which creates a horizontal line. - The
&symbol separates the different columns of a row.
You can create more complex tables with multi-line cells, row and column spans, and custom formatting using packages such as longtable, tabularx, tabulary, booktabs, colortbl and many more. They provide some additional functionality such as line breaking, wrapping, etc.
Here is an example using tabularx package:
\documentclass{article}
\usepackage{tabularx}
\begin{document}
\begin{tabularx}{\textwidth}{|X|c|c|}
\hline
\textbf{Column 1} & \textbf{Column 2} & \textbf{Column 3} \\
\hline
This is a long text that will be automatically wrapped & 1 & 2 \\
\hline
Short text & 3 & 4 \\
\hline
\end{tabularx}
\end{document}
This creates the following table:

The first column uses the X column type, which allows for line-wrapping within cells, so that the text in the first column will automatically wrap to the next line if it exceeds the width of the column.
Inserting mathematical equations
LaTeX is widely used for typesetting mathematical equations because of its powerful and flexible equation-handling capabilities.
There are two ways to include mathematical equations in a LaTeX document:
- Using in-line math mode:
$math equation$ - Using equation environment:
\begin{equation}math equation\end{equation}
The in-line math mode is activated by placing a dollar sign $ before and after the equation. For example:
\documentclass{article}

\begin{document}
The Pythagorean theorem states that $a^2 + b^2 = c^2$.
\end{document}
This example generates the following output:

You can also include the equation environment by using the command \begin{equation} and \end{equation} to create numbered equations. For example:
\documentclass{article}

\begin{document}

\begin{equation}
x = \frac{-b \pm \sqrt{b^2 - 4ac}}{2a}
\end{equation}

\end{document}
This example generates the following output:

In LaTeX, superscript can be written using the caret symbol ^ and subscript are created by using the underscore symbol _.
To subscript or superscript more than one character or symbol, you need to put them inside curly brackets . Otherwise only the first letter/symbol/number following the ˆ and the _ characters will be affected.
LaTeX provides a wide variety of symbols that can be used in mathematical equations. These symbols include basic mathematical operators (such as +, -, and =), Greek letters, mathematical symbols (such as √ and ∞), and many others.
To insert a symbol in a LaTeX equation, you typically use a specific command. For example, to insert the symbol for pi (π), you would use the command \pi.
Here are a few more examples of symbols and their corresponding commands:
- The symbol for sigma (Σ) is
\sum - The symbol for infinity (∞) is
\infty - The symbol for integral (∫) is
\int
The following table shows some example of Greek letter symboles:
| Greek Letter Symbol | Comamnd |
|---|---|
| α | \alpha |
| β | \beta |
| θ | \theta |
| µ | \micro |
| γ | \gamma |
| Γ | \Gamma |
| ∆ | \Delta |
Here's an example of how to use some of these Greek letter symbols in a LaTeX equation:
\documentclass{article}

\begin{document}

\begin{equation}
\alpha + \beta = \theta \degree
\end{equation}

\end{document}
This example generates the following output:

The following table shows some example of math accents symboles:
| Math Accent Symbol Comamnd | Output |
|---|---|
\vec{v} | |
\dot{a} | |
\bar{h} | |
\widehat{abc} |
You can also use some packages like amsmath and amssymb, which provide additional mathematical symbols and environments.
Customizing page layout
LaTeX provides a number of commands and packages for customizing the page layout of a document. Here are just a few examples of the many ways you can customize the page layout of a LaTeX document:
-
- Changing the page size: You can use the
\documentclasscommand to change the page size of your document. For example, to change the page size to A4, you would use the command:
- Changing the page size: You can use the
\documentclass[a4paper]{article}
-
- Changing the margins: You can use the
geometrypackage to change the margins of your document. For example, to set the left and right margins to 1 inch and the top and bottom margins to 1.5 inches, you would use the commands:
- Changing the margins: You can use the
\usepackage[margin=1in, top=1.5in, bottom=1.5in]{geometry}
-
- Changing the line spacing: You can use the
setspacepackage to change the line spacing of your document. For example, to set the line spacing to double, you would use the command:
- Changing the line spacing: You can use the
\usepackage{setspace}
\doublespacing
-
- Adding headers and footers: You can use the
fancyhdrpackage to add headers and footers to your document. For example, to add a centered page number to the bottom of each page, you would use the commands:
- Adding headers and footers: You can use the
\usepackage{fancyhdr}
\pagestyle{fancy}
\fancyhf{}
\rfoot{\thepage}
\renewcommand{\headrulewidth}{0pt}
-
- Changing the page orientation: You can use the
\documentclasscommand with thelandscapeoption to change the page orientation to landscape. For example:
- Changing the page orientation: You can use the
\documentclass[landscape]{article}
Creating custom commands and environments
LaTeX allows you to create custom commands and environments to simplify your document and make it more consistent.
Creating a new command
You can define your own command in LaTeX using the following macros:
\newcommand→ is used to define a new command.\renewcommand→ is used to redefine an existing command.
The basic syntax for defining a new command is:
\newcommand{command_name}[number of arguments][default value of arguments]{definition of command}
For example, to define a new command called \mycommand that prints "Hello, World!", you would use the following code:
\newcommand{\mycommand}{Hello, World!}
Using the command \mycommand in your document, will print "Hello, World!"
To Create a command called \hello that takes a name as an argument and prints "Hello, [name]!", you would use the following code:
\newcommand{\hello}[1]{Hello, #1!}
You can then use the command in your document like this: \hello{Dear TexReady User} will print "Hello, Dear TexReady User!"
it's a good practice to use meaningful names for your commands and to comment them clearly, in order to make your code more readable and easy to maintain.
Here are more examples of how to define your own command in LaTeX:
If you want to create a command that prints the current date in a specific format, you can use the following code:
\newcommand{\currentdate}{\today}
You can then use the command in your document like this: \currentdate that will print the current date in the format set by your LaTeX distribution or the package 'datetime'.
If you want to create a command that takes two arguments, the width and height of a rectangle, and prints the area of the rectangle. You can use the following code:
\newcommand{\rectarea}[2]{\text{Area of the rectangle is: }#1*#2}
You can then use the command in your document like this: \rectarea{5}{8} that will print "Area of the rectangle is: 40".
Creating a new environment
You can define a new environment in LaTeX using the \newenvironment or \renewenvironment macro.
The basic syntax for defining a new environment is:
\newenvironment{environment_name}[number of arguments][default value of arguments]{start code}{end code}
Tips :
environment_name→ is the name of the environment you are defining. It should be a unique name and cannot start with a number or a special character.[number of arguments]→ is the number of arguments that your environment will take. It is optional and if not provided, the environment will not take any arguments.[default value of arguments]→ is the default value of the arguments, if any. It is also optional.{start code}→ is the code that will be executed at the start of the environment.{end code}→ is the code that will be executed at the end of the environment.
For example, if you want to create a new environment called mybox that creates a box around text:
\newenvironment{mybox}{\begin{tcolorbox}}{\end{tcolorbox}}
This sample code creates a new environment called mybox, and the code between the \begin{mybox} and \end{mybox} will be surrounded by a colorbox.
You can then use this environment in your document by including the text you want to be surrounded by the box between \begin{mybox} and \end{mybox} commands, like this:
\documentclass{article}
\usepackage{tcolorbox}

\begin{document}

\newenvironment{mybox}{\begin{tcolorbox}}{\end{tcolorbox}}

\begin{mybox}
This text will be surrounded by a box
\end{mybox}

\end{document}
This example generates the following output:

It is also possible to pass an argument to the environment, for example if you want to change the color of the box, the syntax would be like this:
\documentclass{article}
\usepackage{tcolorbox}

\newenvironment{mybox}[1]{\begin{tcolorbox}[colback=#1]}{\end{tcolorbox}}

\begin{document}

\begin{mybox}{yellow}
This text will be surrounded by a yellow box
\end{mybox}

\end{document}
This example generates the following output:

You can customize the environment by adding more option to it, such as the box size or the font color, and so on.
Table of contents, figures and tables
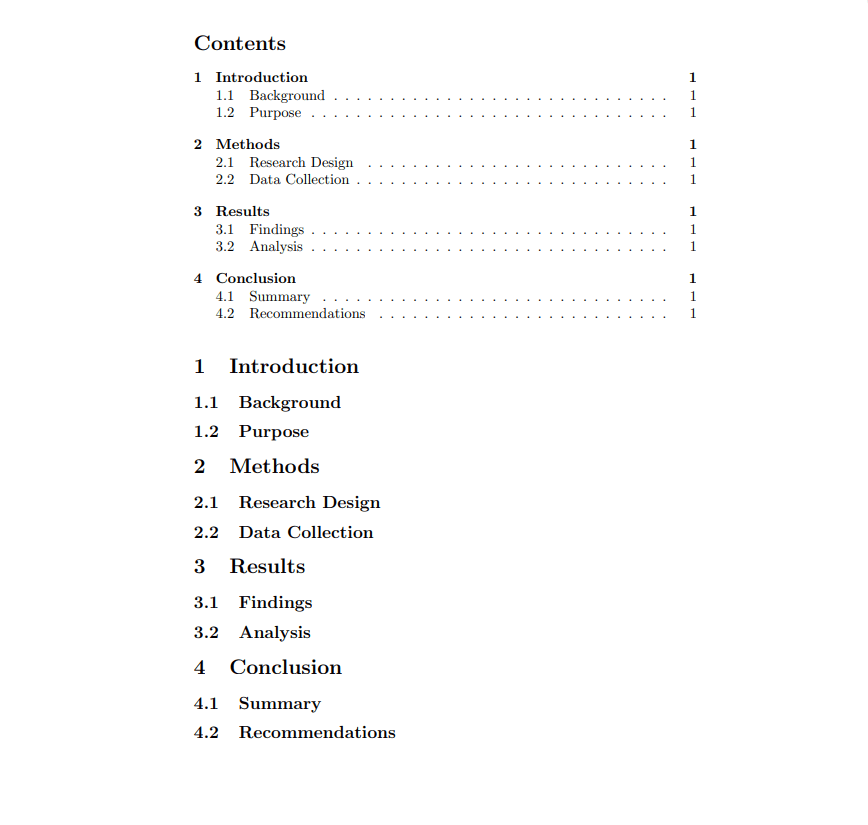
In LaTeX, creating a table of contents (TOC) is done by using the \tableofcontents command.
The \tableofcontents command is placed at the beginning of the document and it will automatically generate a TOC that includes all sections and sub-sections in the document.
\documentclass{article}

\begin{document}

\tableofcontents

\section{Introduction}
\subsection{Background}
\subsection{Purpose}

\section{Methods}
\subsection{Research Design}
\subsection{Data Collection}

\section{Results}
\subsection{Findings}
\subsection{Analysis}

\section{Conclusion}
\subsection{Summary}
\subsection{Recommendations}

\end{document}
This example will create the following table of contents:
You can also use tocloft package in order to customize the TOC, such as changing the font size and format of the section titles. You need to include the tocloft package in the preamble of your document using the following command:
\usepackage{tocloft}
For creating a list of figures, you can use the \listoffigures command. For example:
\documentclass{article}
\usepackage{graphicx}

\begin{document}

\listoffigures

\begin{figure}[h]
\centering
\includegraphics[width=0.5\linewidth]{example-image-a}
\caption{Example Image A}
\label{fig:imageA}
\end{figure}

\begin{figure}[h]
\centering
\includegraphics[width=0.5\linewidth]{example-image-b}
\caption{Example Image B}
\label{fig:imageB}
\end{figure}

\end{document}
This will create a list of figures that includes the caption and page number of each figure in the document:
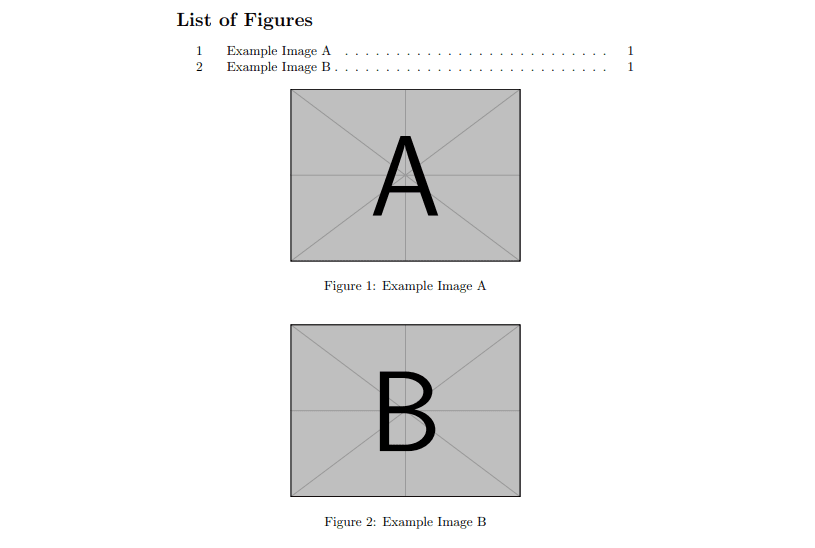
You need to include \usepackage{graphicx} in the preamble of your document.
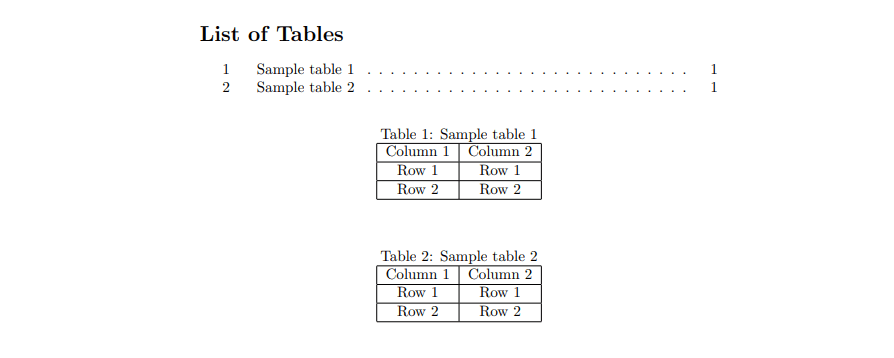
To create a list of tables at the beginning of a document in LaTeX, you can use the \listoftables command. For example:
\documentclass{article}

\begin{document}

\listoftables

\begin{table}[h]
\centering
\caption{Sample table 1}
\begin{tabular}{|c|c|}
\hline
Column 1 & Column 2 \\
\hline
Row 1 & Row 1 \\
\hline
Row 2 & Row 2 \\
\hline
\end{tabular}
\end{table}

\begin{table}[h]
\centering
\caption{Sample table 2}
\begin{tabular}{|c|c|}
\hline
Column 1 & Column 2 \\
\hline
Row 1 & Row 1 \\
\hline
Row 2 & Row 2 \\
\hline
\end{tabular}
\end{table}

\end{document}
This example generates the following output:
Conclusion
In conclusion, LaTeX is a powerful tool for creating professional-looking documents. With TexReady, it's easy to get started and take advantage of all its features.
Whether you're writing a simple letter or a complex research paper, TexReady has everything you need to create beautiful documents with ease. With its user-friendly interface, helpful documentation, and community support, you can quickly master the basics and start producing high-quality content.
So why wait? Give TexReady a try and experience the power of LaTeX for yourself!