Positioning Images and Tables
Positioning images and tables in LaTeX involves determining their placement within the document. LaTeX provides various options for positioning figures and tables, allowing you to control where they appear relative to the surrounding text.
Introduction
Positioning Images and Tables is a crucial aspect of document layout in LaTeX. It enhances the overall quality, readability, and comprehension of the document. This section guides you on how to precisely position and align images and tables within your document, as well as learning about different placement options.
Strategically positioning images and tables offers several benefits, including:
- Highlighting important content to draw attention
- Supporting the text and facilitating reader comprehension
- Creating visually appealing layouts through well-placed elements
- Improving the aesthetic quality of the document and enhancing the overall user experience.
Image plecement
In a LaTeX document, images are treated as floating objects. This means that LaTeX automatically determines the best placement for the image.
By default:
- The horizontal alignment of images in LaTeX is set to left within the available space.
- The vertical alignment of images, on the other hand, depends on the surrounding text and the line spacing settings.
When positioning images within a document, LaTeX offers various options to control their placement. These options allow you to specify where the image should appear in relation to the surrounding text and other elements. Here are some common methods for positioning images:
The placement specifier of the figure environment
In LaTeX, the placement specifier is an optional argument that can be used with the figure environment to control where the figure is positioned on the page. The placement specifier is written inside square brackets immediately after the \begin{figure} command.
Here are the most commonly used placement specifiers:
| Placement Specifier | Description |
|---|---|
h | Place the figure "here", i.e., at the current location in the text. This is the most restrictive option, as it only allows LaTeX to place the figure on the same page as the text |
t | Place the figure at the top of a page |
b | Place the figure at the bottom of a page |
p | Place the figure on a page that contains only floats (figures and tables) |
! | Override LaTeX's internal positioning rules |
Multiple placement specifiers can be combined, such as ht to allow LaTeX to place the figure either "here" or at the top of a page.
It is important to note that the placement specifier is only a suggestion to LaTeX, and it may not always be followed. LaTeX has its own set of rules and algorithms for placing figures on the page, and it may override the placement specifier if it cannot find a suitable location.
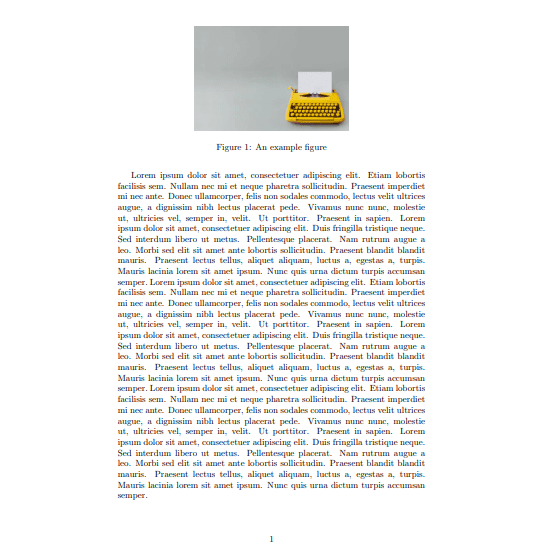
Here's an example of using a placement specifier in order to place the figure at the top of a page:
\documentclass{article}
\usepackage{graphicx} % Required for including images
\usepackage{blindtext} % Required for dummy text
\begin{document}

\blindtext[3]

\begin{figure}[t]
  \centering
  \includegraphics[width=0.5\textwidth]{example-image.png}
  \caption{An example figure}
  \label{fig:example}
\end{figure}

\end{document}
This example generates the following output:
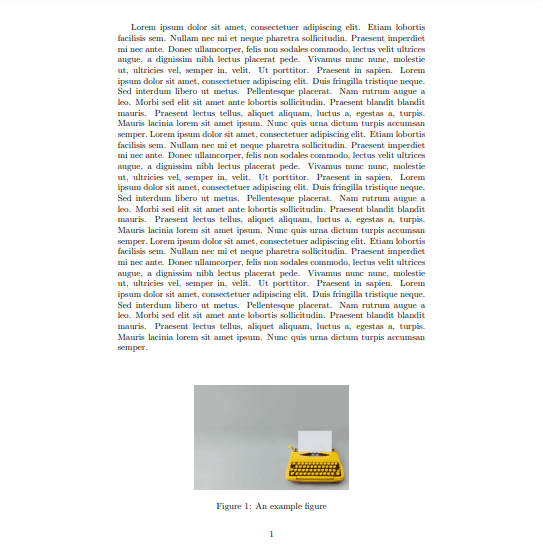
In the next example, the placement specifier b is used to place the figure at the bottom of the page:
\documentclass{article}
\usepackage{graphicx} % Required for including images
\usepackage{blindtext} % Required for dummy text
\begin{document}

\blindtext[3]

\begin{figure}[b]
  \centering
  \includegraphics[width=0.5\textwidth]{example-image.png}
  \caption{An example figure}
  \label{fig:example}
\end{figure}

\end{document}
This example generates the following output:
Controlling image position with [H] placement specifier of float package
To use the float package for controlling image placement and avoiding undesired floating behavior, you can follow these steps:
- Add the
floatpackage to your LaTeX document by including the following line in the preamble of your document:
\usepackage{float}
- Specify the
[H]placement specifier within the figure environment to override the default floating behavior. This will force the image to be placed exactly where it is defined in the document. For example:
\begin{figure}[H]
  \centering
  \includegraphics{example-image}
  \caption{Example image with fixed placement}
  \label{fig:fixed}
\end{figure}
Using the float package and specifying [H] as the placement specifier will ensure that the images are positioned exactly where they are defined, without floating.
The difference between the H option and h option
-
Hoption (provided by the float package) → It is a stronger placement specifier that stands for "Here, exactly here". It overrides the default floating behavior and forces the image to be placed exactly at the location where it is defined in the document. The image will not float to other parts of the document, even if it results in a less optimal layout. -
hoption → It is a regular placement specifier that stands for "Here". It suggests to LaTeX that the image should be placed at the current location if possible, but allows some flexibility for LaTeX to adjust the placement slightly for better overall layout.
Adjust the placement of images using the adjustbox package
The adjustbox package provides several commands and options to adjust the placement of images within a document.
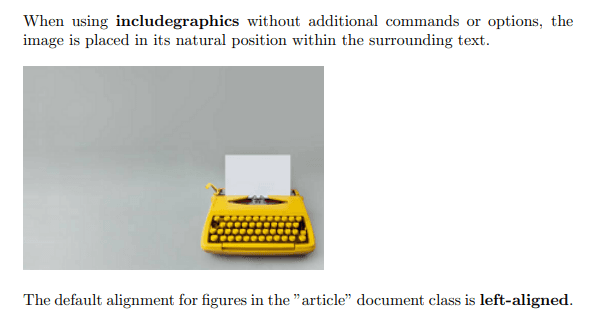
In most document classes, the default alignment for an image included using \includegraphics is left-aligned, for example:
\documentclass{article}
\usepackage{graphics}

\begin{document}

\noindent
When using \textbf{includegraphics} without additional commands or options, the image is placed in its natural position within the surrounding text.

\begin{figure}[h]
  \includegraphics{example-image.png}
\end{figure}

\noindent The default alignment for figures in the "article" document class is \textbf{left-aligned}.

\end{document}
The image is left-aligned as expected:
You can use the center option in adjustbox to center the image horizontally within the text area:
\documentclass{article}
\usepackage{adjustbox}
\usepackage{graphics}
\begin{document}
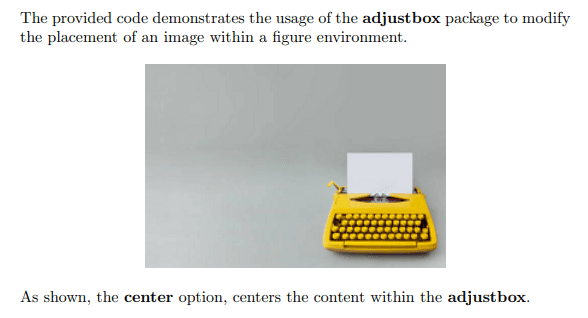
\noindent The provided code demonstrates the usage of the \textbf{adjustbox} package to modify the placement of an image within a figure environment.
\begin{figure}[h]
\begin{adjustbox}{center}
\includegraphics{example-image.png}
\end{adjustbox}
\end{figure}
\noindent As shown, the \textbf{center} option, centers the content within the \textbf{adjustbox}.
\end{document}
This example generates the following output. Now the image is center-aligned:
Here are the available options:
| Option | Description |
|---|---|
left | Aligns the image to the left side. |
right | Aligns the image to the right side. |
center | Centers the image horizontally. |
outer | Aligns content to the outer margin (right margin for odd-numbered pages, left margin for even-numbered pages) in a two-sided document. |
inner | Aligns content to the inner margin (left margin for odd-numbered pages, right margin for even-numbered pages) in a two-sided document. |
The adjustbox environment allows for additional customization of the image placement and properties, such as scaling, rotation, or padding, if desired.
Managing placement of multiple images in one figure
Managing the placement of multiple images in one figure enables organized and visually cohesive presentations.
The subfigure environment, which is part of the subcaption package, provides a convenient way to create subfigures within a larger figure in LaTeX. It allows you to divide a figure into multiple smaller parts, each with its own caption and label.
To use the subcaption package, include the following in your LaTeX document preamble:
\usepackage{subcaption}
Then, you can use the subfigure environment provided by the subcaption package to create subfigures within a larger figure, as demonstrated in the following example:
\documentclass{article}
\usepackage{subcaption}
\usepackage{graphicx}
\setlength{\parindent}{0pt}
\begin{document}
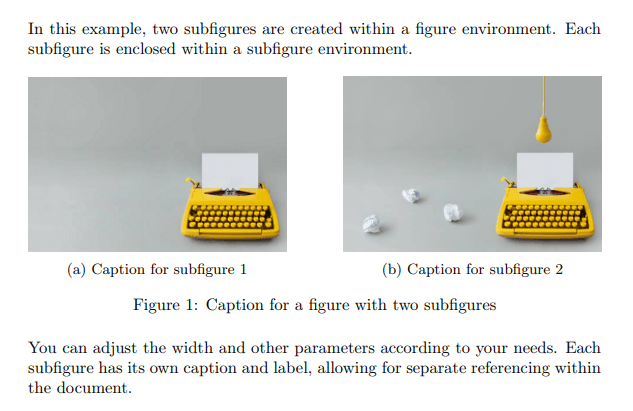
In this example, two subfigures are created within a figure environment. Each subfigure is enclosed within a subfigure environment.
\begin{figure}[h]
\centering
\begin{subfigure}{0.45\textwidth}
\centering
\includegraphics[width=\textwidth]{example-image.png}
\caption{Caption for subfigure 1}
\label{fig:subfigure1}
\end{subfigure}
\hfill
\begin{subfigure}{0.45\textwidth}
\centering
\includegraphics[width=\textwidth]{2.png}
\caption{Caption for subfigure 2}
\label{fig:subfigure2}
\end{subfigure}
\caption{Caption for a figure with two subfigures}
\label{fig:subfigures}
\end{figure}
You can adjust the width and other parameters according to your needs. Each subfigure has its own caption and label, allowing for separate referencing within the document.
\end{document}
This example generates the following output:
Tips:
\begin{subfigure}{width}→ Specifies the width of the subfigure. You can provide a length value, such as '5cm' or '0.5\textwidth', to set the width of the subfigure relative to the parent figure's width.\subcaption→ Used to specify the caption for the subfigure. Each subfigure can have its own caption.\label→ Used to assign a label to the subfigure. Labels can be used for cross-referencing within the document.\captionsetup→ Allows you to configure additional settings for the subcaption, such as formatting options, justification, and more.
Remember to compile your LaTeX document multiple times to ensure that the references and layout are properly updated.
Wrapping text around a figure using the wrapfig package
Wrapping text around a figure is a common technique used to integrate images seamlessly into the surrounding text. It allows the text to flow around the figure, creating a visually appealing layout. In LaTeX, you can achieve text wrapping using the wrapfig package.
To wrap text around a figure, you need to follow these steps:
- Load the
wrapfigpackage in the preamble of your document:
\usepackage{wrapfig}
- Insert the
wrapfigureenvironment at the desired location in your document. The wrapfigure environment takes two required arguments:
\begin{wrapfigure}{<placement>}{<width>}
  % Figure content and caption
\end{wrapfigure}
Where:
-
<placement>→ This mandatory argument specifies the placement of the figure relative to the text. Common options include:r→ rightl→ lefti→ inside margin (near the binding edge of a two-sided document)o→ outside margin
-
<width>→ This mandatory argument sets the width of the wrapped figure. It can be specified using a length such as 5cm or a relative value such as 0.5\textwidth.
- Inside the
wrapfigureenvironment, use the\includegraphicscommand to insert the image you want to wrap the text around.
\begin{wrapfigure}{<placement>}{<width>}
  \includegraphics[<width>]{<image_filename>}
\end{wrapfigure}
Adjust the width of the image if necessary to fit within the specified width of the wrapfigure environment.
-
Optionally, provide a caption for the figure using the
\captioncommand. This will add a caption below the wrapped figure. -
Continue writing your text after the wrapfigure environment, and the text will flow around the figure according to the placement specified.
Here's a simple example demonstrating the usage of the wrapfigure environment:
\documentclass{article}
\usepackage{wrapfig}
\usepackage{graphicx}
\setlength{\parindent}{0pt}

\begin{document}

Wrapping text around a figure in a document is a technique used to integrate images smoothly into the surrounding text, creating a visually appealing layout.
It allows the text to flow around the figure instead of breaking the flow.

\begin{wrapfigure}{r}{0.5\textwidth}
  \includegraphics[width=0.5\textwidth]{example-image.png}
  \caption{A wrapped figure}
\end{wrapfigure}

In LaTeX, you can achieve this effect using the \textbf{wrapfig} package. By enclosing the figure within a \textbf{wrapfigure} environment, you can specify the placement and width of the figure, and the text will automatically wrap around it. This technique is particularly useful when you want to include images within paragraphs or when you have limited space for figures. In this example, the \textbf{wrapfigure} environment is used with the placement option \textbf{r} to wrap the text around the figure on the right side. The figure has a width of \verb|{0.5\textwidth}| .The \verb|\includegraphics| command is used to insert the image, and the \verb|\caption| command adds a caption below the wrapped figure.

\end{document}
This example generates the following output:
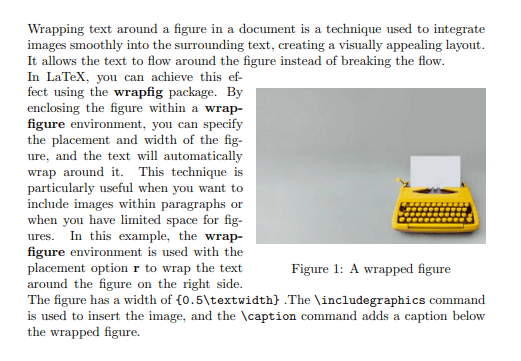
In this example, the wrapfigure environment is used with the placement option r to wrap the text around the figure on the right side.
Table placement
Table placement is an essential aspect of creating well-organized and readable documents. Effectively positioning tables within your text helps present data in a clear and logical manner. Understanding table placement techniques ensures that your tables are strategically positioned to enhance readability, maintain document flow, and create visually appealing and informative documents.
The placement specifier of the table environment
In LaTeX, The table environment is a container that allows you to create and position tables within your document.
When using the table environment, you typically include the table content within the \begin{table} and \end{table} tags. This tells LaTeX that the enclosed content should be treated as a table:
\begin{table}[placement]
  % table content
\end{table}
The table environment acts as a floating environment, which means that LaTeX automatically determines the best position for the table based on various factors such as available space, page layout, and other content elements.
You can also guide the placement of the table using placement specifiers:
| Placement Specifier | Description |
|---|---|
h | Place the table approximately at the current position. |
t | Position the table at the top of a page. |
b | Position the table at the bottom of a page. |
p | Places the table on a separate page dedicated to floats (tables and figures) only. |
! | Overrides certain internal parameters to force LaTeX to try harder to place the table according to your preferences. |
For example the following table is placed at the current position using the h placement specifier:
\documentclass{article}
\usepackage[table]{xcolor}
\setlength{\arrayrulewidth}{0.3mm}
\arrayrulecolor[HTML]{1A5276}
\setlength{\parindent}{0pt}
\begin{document}
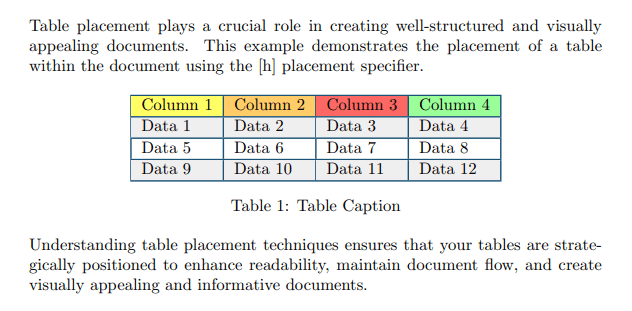
Table placement plays a crucial role in creating well-structured and visually appealing documents. This example demonstrates the placement of a table within the document using the [h] placement specifier.
\begin{table}[h]
\centering
\begin{tabular}{|l|l|l|l|}
\hline
\cellcolor[HTML]{FFFE65}Column 1 &
\cellcolor[HTML]{FFCC67}Column 2 &
\cellcolor[HTML]{FD6864}Column 3 &
\cellcolor[HTML]{9AFF99}Column 4 \\ \hline
\rowcolor[HTML]{EFEFEF}
Data 1 & Data 2 & Data 3 & Data 4 \\ \hline
Data 5 & Data 6 & Data 7 & Data 8 \\ \hline
\rowcolor[HTML]{EFEFEF}
Data 9 & Data 10 & Data 11 & Data 12 \\ \hline
\end{tabular}
\caption{Table Caption}
\label{tab:my_label}
\end{table}
Understanding table placement techniques ensures that your tables are strategically positioned to enhance readability, maintain document flow, and create visually appealing and informative documents.
\end{document}
This example generates the following output:
In the following example the table is placed at the top of the page using the t placement specifier:
\documentclass{article}
\usepackage[table]{xcolor}
\setlength{\arrayrulewidth}{0.3mm}
\arrayrulecolor[HTML]{1A5276}
\setlength{\parindent}{0pt}
\begin{document}
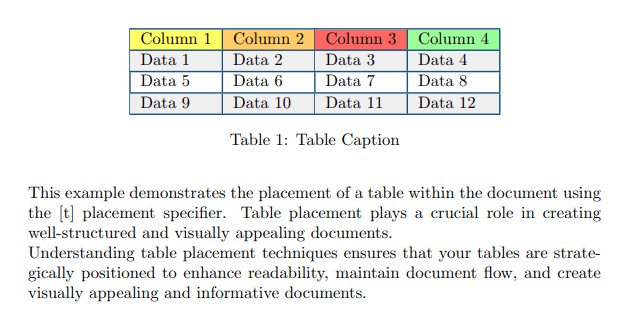
This example demonstrates the placement of a table within the document using the [t] placement specifier. Table placement plays a crucial role in creating well-structured and visually appealing documents.
\begin{table}[t]
\centering
\begin{tabular}{|l|l|l|l|}
\hline
\cellcolor[HTML]{FFFE65}Column 1 &
\cellcolor[HTML]{FFCC67}Column 2 &
\cellcolor[HTML]{FD6864}Column 3 &
\cellcolor[HTML]{9AFF99}Column 4 \\ \hline
\rowcolor[HTML]{EFEFEF}
Data 1 & Data 2 & Data 3 & Data 4 \\ \hline
Data 5 & Data 6 & Data 7 & Data 8 \\ \hline
\rowcolor[HTML]{EFEFEF}
Data 9 & Data 10 & Data 11 & Data 12 \\ \hline
\end{tabular}
\caption{Table Caption}
\label{tab:my_label}
\end{table}
Understanding table placement techniques ensures that your tables are strategically positioned to enhance readability, maintain document flow, and create visually appealing and informative documents.
\end{document}
This example generates the following output:
Controlling table position with [H] placement specifier of float package
The H specifier is not part of the standard LaTeX, but it is provided by the float package. It forces the table to be placed exactly at the position in the source code, overriding its default floating behavior.
To use the H specifier of the float package for precise table placement:
- Add the
floatpackage to your LaTeX document by including the following line in the preamble of your document:
\usepackage{float}
- Inside the table environment, specify the
Hspecifier within square brackets. For example:
\begin{table}[H]
    % Table content
\end{table}
By using the H specifier, you are instructing LaTeX to place the table exactly where it is defined in the source code, overriding any other placement options.
Table placement with the placeins package
The placeins package provides additional control over the placement of floats, such as tables and figures.
It offers the \FloatBarrier command, which creates a barrier that prevents floats from floating beyond that point in the document.
The main purpose of the placeins package is to help maintain the placement of floats within specific sections or chapters, ensuring that they do not float to a different section or chapter. This can be useful when you want to keep related content together and improve the organization and readability of your document.
To use the placeins package, you need to include the following line in the preamble of your LaTeX document:
\usepackage{placeins}
Then you can place the \FloatBarrier command at specific locations in your document where you want to restrict the floating behavior of floats.
Here's an example of how to use the \FloatBarrier command:
\documentclass{article}
\usepackage{placeins}

\begin{document}

\section{Introduction}

The \verb|\FloatBarrier| command is provided by the \textbf{placeins} package and it acts as a barrier that prevents floats such as tables and figures from floating past it.

\begin{table}[ht]
  \centering
  \begin{tabular}{|c|c|c|c|}
    \hline
    Column 1 & Column 2 & Column 3 & Column 4 \\
    \hline
    Data 1 & Data 2 & Data 3 & Data 4\\
    \hline
  \end{tabular}
  \caption{Example Table}
  \label{tab:example}
\end{table}

\FloatBarrier

\section{Analysis}

In the above example, the \verb|\FloatBarrier| command is placed after the table environment. It creates a barrier that prevents any floats (tables or figures) from floating past it.

\end{document}
This example generates the following output:
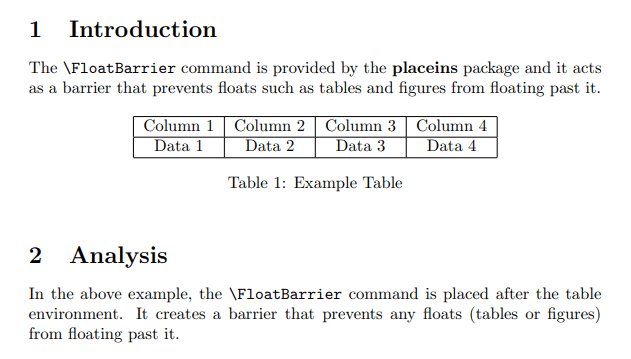
In this example, the \FloatBarrier command is placed after the table environment. It creates a barrier that prevents any floats (tables or figures) from floating past it. In this case, it ensures that the table is placed before the "Analysis" section starts. This can be useful when you want to restrict the floating of tables or figures within specific sections of your document.
Wrapping text around a table using the wrapfig package
Wrapping text around a table refers to the technique of aligning text in a way that it flows around the table instead of creating a separate space for the table. This can make the document layout more visually appealing and optimize the use of space.
To achieve text wrapping around a table, you can use the wraptable environment provided by wrapfig package:
- Load the
wrapfigpackage in the preamble of your document:
\usepackage{wrapfig}
- Define the wrapping region using the
wraptableenvironment:
\begin{wraptable}{placement}{width}
    % Table content
\end{wraptable}
Replace placement with r for right alignment or l for left alignment. Specify the desired width of the table.
- (Optional) Adjust the table and text placement using lineheight:
\begin{wraptable}[lineheight]{placement}{width}
    % Table content
\end{wraptable}
You can use the lineheight argument to specify the number of lines the table should span vertically. This helps prevent the table from overlapping with the text.
- Add the table content:
Inside the wraptable environment, use the regulartabularortableenvironment to define your table's content. For example:
\begin{wraptable}{r}{0.5\textwidth}
    \begin{tabular}{|c|c|}
        \hline
        Header 1 & Header 2 \\
        \hline
        Data 1 & Data 2 \\
        \hline
    \end{tabular}
\end{wraptable}
- Customize the appearance:
You can apply additional formatting and styling to the table, just like in a regular table. For example, you can add borders, colors, or adjust column widths using the usual table formatting commands.
By following these steps, the table will be wrapped with text flowing around it, creating an integrated layout.
Here's an example of wrapping text around a table using the wrapfig package:
\documentclass{article}
\usepackage{wrapfig}
\usepackage[table]{xcolor}
\setlength{\arrayrulewidth}{0.3mm}
\arrayrulecolor[HTML]{1A5276}
\setlength{\parindent}{0pt}
\begin{document}
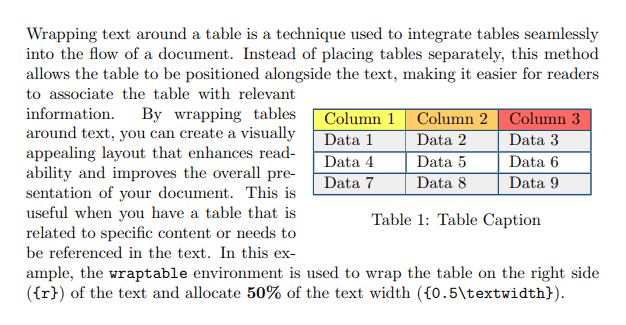
Wrapping text around a table is a technique used to integrate tables seamlessly into the flow of a document. Instead of placing tables separately, this method allows the table to be positioned alongside the text, making it easier for readers
\begin{wraptable}{r}{0.5\textwidth}
\begin{tabular}{|l|l|l|}
\hline
\cellcolor[HTML]{FFFE65}Column 1 &
\cellcolor[HTML]{FFCC67}Column 2 &
\cellcolor[HTML]{FD6864}Column 3 \\ \hline
\rowcolor[HTML]{EFEFEF}
Data 1 & Data 2 & Data 3 \\ \hline
Data 4 & Data 5 & Data 6 \\ \hline
\rowcolor[HTML]{EFEFEF}
Data 7 & Data 8 & Data 9 \\ \hline
\end{tabular}
\caption{Table Caption}
\label{tab:table_label}
\end{wraptable}
to associate the table with relevant information. By wrapping tables around text, you can create a visually appealing layout that enhances readability and improves the overall presentation of your document. This is useful when you have a table that is related to specific content or needs to be referenced in the text. In this example, the \verb|wraptable| environment is used to wrap the table on the right side (\verb|{r}|) of the text and allocate \textbf{50\%} of the text width (\verb|{0.5\textwidth}|).
\end{document}
This example generates the following output: