Footnotes and Margin Notes
Explore the world of footnotes and margin notes, where additional context, explanations, references and side comments enhance your writing by offering additional context and insightful details without disrupting the flow of your main text.
Footnotes in LaTeX
In LaTeX, footnotes are a convenient way to provide additional information or references to the reader without interrupting the flow of the main text. Footnotes are typically placed at the bottom of the page and marked by a number or symbol in the main text. When the reader clicks on the number or symbol, they are taken to the corresponding footnote at the bottom of the page.
The \footnote command
LaTeX provides a simple command to create a footnote in your document:
\footnote{text}
The text that you want to appear in the footnote should be placed within the curly braces following the command.
Here's an example of how to use the \footnote command in LaTeX:
\documentclass{article}

\begin{document}

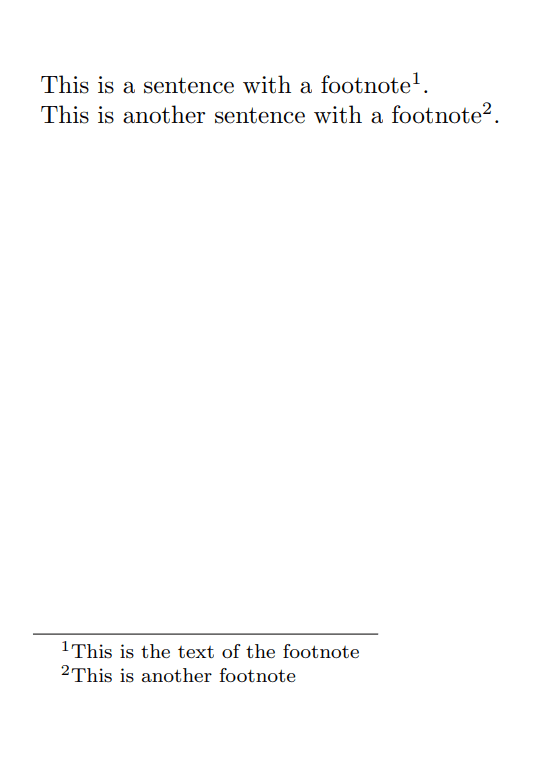
This is a sentence with a footnote\footnote{This is the text of the footnote}.

This is another sentence with a footnote\footnote{This is another footnote}.

\end{document}
This example generates the following output:
By default, the \footnote command in LaTeX generates footnote markers as sequential Arabic numerals starting from 1. However, you can manually set the value of the footnote marker by placing the desired number as an argument to the \footnote command:
\footnote[number]{text}
Here's an example:
\documentclass{article}

\begin{document}

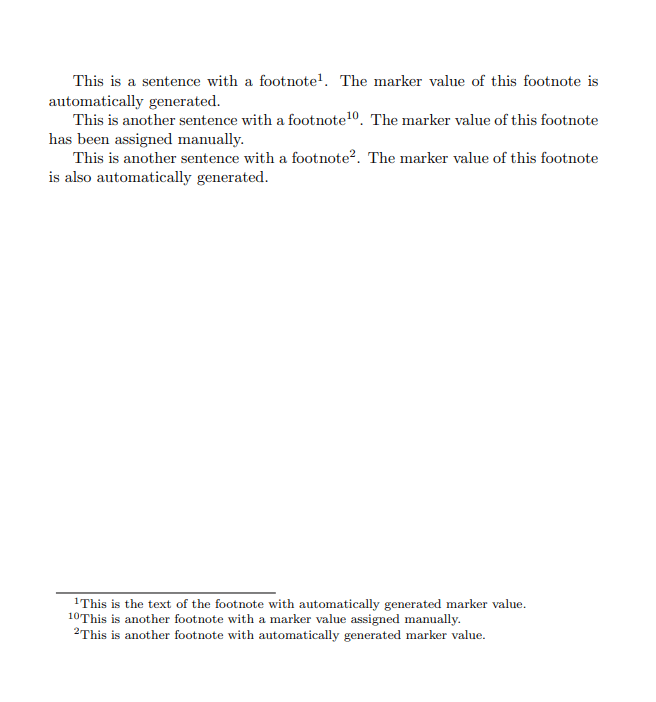
This is a sentence with a footnote\footnote{This is the text of the footnote with automatically generated marker value.}. The marker value of this footnote is automatically generated.

This is another sentence with a footnote\footnote[10]{This is another footnote with a marker value assigned manually.}. The marker value of this footnote has been assigned manually.

This is another sentence with a footnote\footnote{This is another footnote with automatically generated marker value.}. The marker value of this footnote is also automatically generated.

\end{document}
This example generates the following output:
The footnote marker value
In LaTeX, footnote markers are internally represented as a counter that is automatically incremented for each new footnote. The default footnote marker value is an Arabic numeral, starting from 1 for the first footnote and increasing by 1 for each subsequent footnote.
However, you can customize the appearance of the footnote marker by redefining the counter representation using commands such as \arabic, \roman, \alph, or \Alph.
Here's an example of customizing the appearance of the footnote marker by redefining the \thefootnote command:
\documentclass{article}
\usepackage{xcolor} % For colors

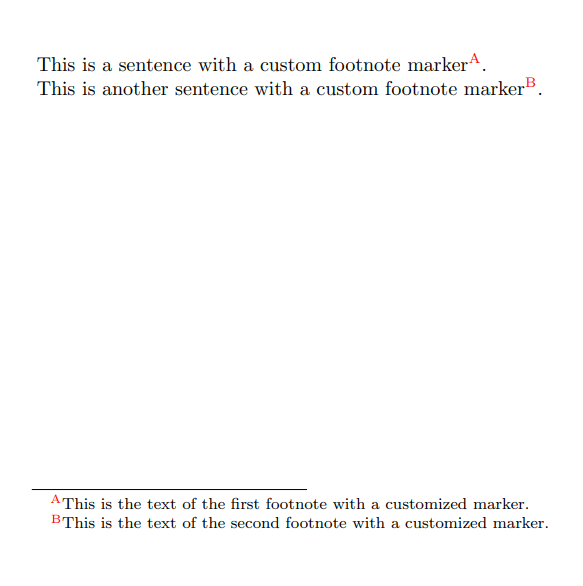
\renewcommand{\thefootnote}{\textcolor{red}{\Alph{footnote}}} % Customizing the appearance to use red-colored capital letters

\begin{document}

This is a sentence with a custom footnote marker\footnote{This is the text of the first footnote with a customized marker.}.

This is another sentence with a custom footnote marker\footnote{This is the text of the second footnote with a customized marker.}.

\end{document}
This example generates the following output:
In the above example:
\textcolor{red}{...}→ changes the color of the text to red.\Alph{footnote}→ takes the numeric value of the footnote and converts it into a capital letter (A, B, C...).
The \thefootnote command is used to redefine the appearance of the footnote marker for example to change the numbering style or format of the footnote marker.
Other LaTeX footnote commands
In addition to \footnote command mentioned above, LaTeX provides other commands related to footnotes that help create and manage footnotes within a document.
The \footnotemark command
This command is used to insert a footnote marker in the text without creating the corresponding footnote text. The footnote text can be added later with the command \footnotetext.
Here's the basic syntax of the \footnotemark command:
\footnotemark[marker]
This command can be utilized in two ways:
-
With an optional argument
[marker]: This optional argument represents the value you want to assign to the footnote marker. For instance,\footnotemark[3]would display a footnote marker with the value 3.Using
\footnotemark[marker]lets you control the numbering or symbols used for specific footnotes within your document. This manual assignment overrides the automatic numbering provided by LaTeX, enabling customization of individual footnote markers. -
Without an argument : It automatically increments the footnote counter by 1, generating markers sequentially.
The \footnotetext command
This command is used to add text to a previously created footnote marker using \footnotemark.
\footnotetext[marker]{text}
Where:
[marker]: Optional argument that specifies the marker value (such as a number or symbol) associated with the footnote. If not provided, it continues the sequence of markers from the previous\footnotemark.{text}: Represents the content or text of the footnote that corresponds to the specified marker.
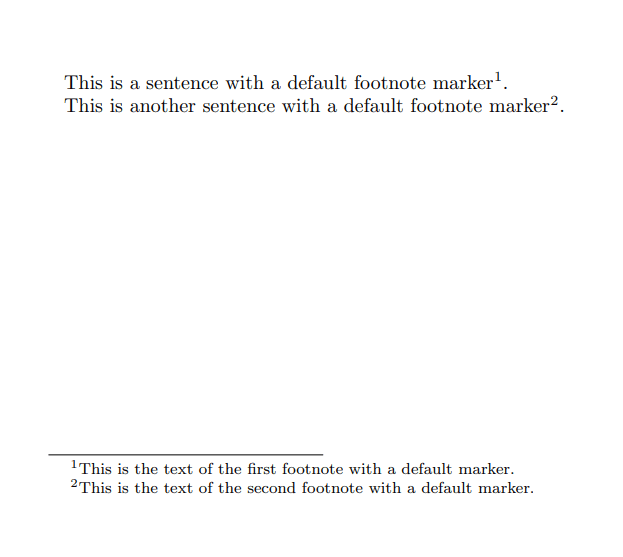
Here's an example of using the footnotemark and footnotetext commands:
\documentclass{article}

\begin{document}

This is a sentence with a default footnote marker\footnotemark.
\footnotetext{This is the text of the first footnote with a default marker.}

This is another sentence with a default footnote marker\footnotemark.
\footnotetext{This is the text of the second footnote with a default marker.}

\end{document}
This example generates the following output:
Here are some more commonly used footnote commands in LaTeX:
| Latex Command | Description |
|---|---|
\footnoterule | Inserts a horizontal rule above the footnote area, separating the footnotes from the main text. |
\footnotesize | Sets the font size for the footnote text. |
\footnoteborder | Sets the border around the footnote area. |
\footins | Controls the layout of footnotes. |
\footnotesep | Specifies the vertical space between the last line of the text and the first footnote. |
Margin notes in LaTeX
Margin notes are a useful way to add extra information, comments, or reminders to a document. They are often used in academic writing, technical documentation, or any other kind of text where additional context or details can enhance the reader's understanding.
LaTeX provides several commands and packages for creating margin notes, including the built-in \marginpar command and the marginnote package. In this section, we will explore the usage and customization of these tools to create effective and visually appealing margin notes in your LaTeX documents.
The \marginpar command
The \marginpar command in LaTeX is used to create a margin note.
It takes one required argument, which is the text of the margin note to be displayed inside the curly braces:
\marginpar{text}
Where text represents the content you want to include in the margin note.
By default, the note is aligned with the right margin of the page where the command is used, but you can specify the side using optional arguments.
The general syntax of the \marginpar command is as follows:
\marginpar[left text]{right text}
Here, right text is the required argument and represents the text to be displayed in the margin. The optional argument left text represents the text to be displayed in the margin on the left side of the page.
If you do not specify the optional argument, the margin note will be displayed on the right side of the page.
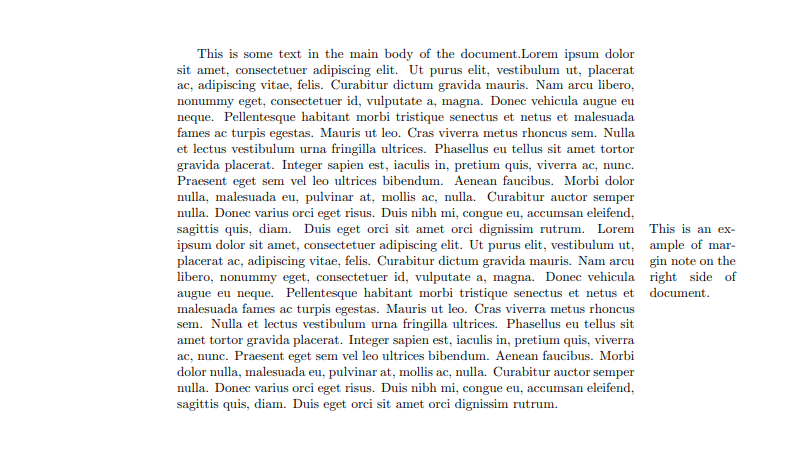
Here's an example of using marginpar command:
\documentclass{article}
\usepackage{lipsum} % for dummy text

\begin{document}

This is some text in the main body of the document.\lipsum[1] \marginpar{This is an example of margin note on the right side of document.}\lipsum[1]

\end{document}
This example generates the following output:
Reversing the position of margin notes
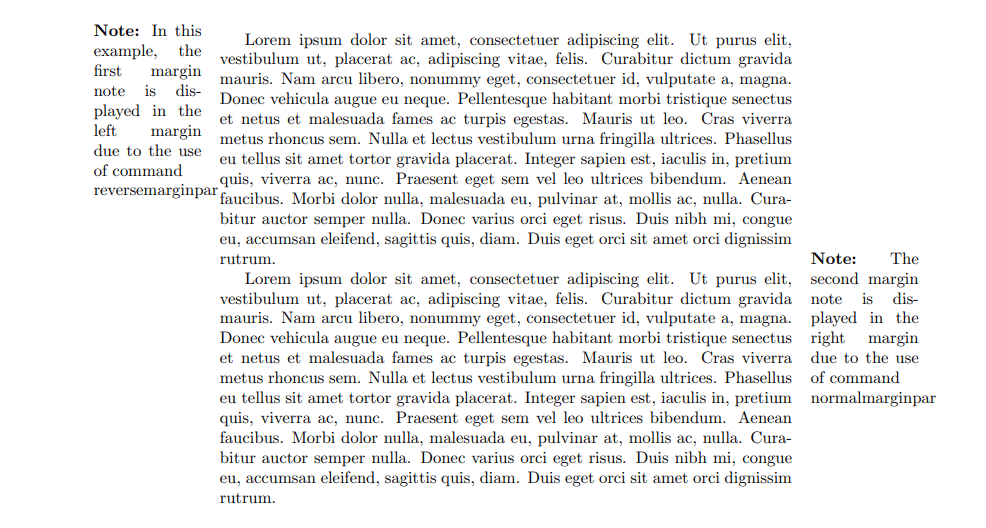
The \reversemarginpar and \normalmarginpar commands are used to switch the side of the margin where the margin note is displayed. By default, margin notes are displayed in the right margin in one-sided documents and in the outer margin in two-sided documents.
The \reversemarginpar command switches the margin note to the opposite side, while the \normalmarginpar command switches it back to the default side.
Here's an example usage of these commands:
\documentclass{article}
\usepackage{lipsum}

\begin{document}

\reversemarginpar
\marginpar{\textbf{Note:} In this example, the first margin note is displayed in the left margin due to the use of command \\reversemarginpar}

\lipsum[1]

\normalmarginpar
\marginpar{\textbf{Note:} The second margin note is displayed in the right margin due to the use of command \\normalmarginpar}

\lipsum[1]

\end{document}
This example generates the following output:
The marginnote package
The marginnote package provides an alternative to the standard LaTeX \marginpar command for producing margin notes. It offers additional functionality and customization options compared to the \marginpar command, including the ability to set the alignment of the margin note, adjust the spacing, and change the font style.
Here's an example of using the margin note package:
\documentclass{article}

\usepackage{marginnote} % for margin notes
\usepackage{lipsum} % for dummy text
\usepackage{xcolor} % for text color

\begin{document}

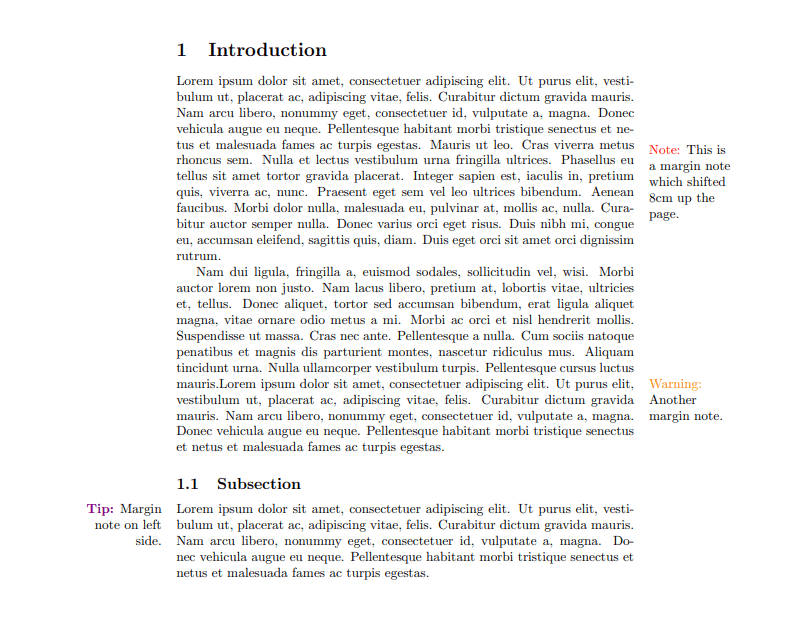
\section{Introduction}
\lipsum[1]\marginnote{\textcolor{red}{Note:} This is a margin note which shifted 8cm up the page.}[-8em]

\lipsum[2]\marginnote{\textcolor{orange}{Warning:} Another margin note.}\lipsum[1][1-6]

\subsection{Subsection}
\reversemarginpar\marginnote{\textbf{\textcolor{violet}{Tip:}} Margin note on left side.}\lipsum[1][1-6]

\end{document}
This example generates the following output:
